Some of my favorite Cricut projects are personalized t-shirts. It is such a fun way to announce a new baby, show your team spirit, celebrate a family reunion, or to let people know your sassy personality. Whatever the occasion…there’s probably a t-shirt for that!
Cricut Iron-on, or what some may refer to as Heat Transfer Vinyl (HTV), is available in a wide variety of colors, types, textures, and patterns. Unlike Adhesive Vinyl that comes with paper backing and is sticky when peeled back, Heat Transfer Vinyl instead comes with a clear plastic carrier sheet that covers the top to protect it when you apply heat to activate the adhesive on to fabric or other surfaces that can accept the heat.
When cutting Cricut Iron-on you will want to place the carrier sheet down onto your mat and cut it from the back. To do this you will “mirror” your image so that it will display correctly when transferred to your item.
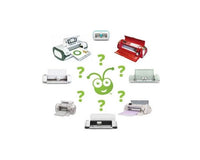
Many people wonder what the best heat source is when applying Cricut Iron-on. There are a few things you want to consider when choosing your heat source:
- Consistent heat
- Pressure
- Size of your projects
- Portability
When starting out with Iron-on material crafters often use the household iron. This can work but some of the drawbacks are that the temperature can vary across the plate of the iron and it can be hard to apply consistent pressure if you are working with a large design – both of which can result in your design peeling back after a short period of time.Some crafters that create a large volume of Iron-on projects like to invest in their own heat press. These can be expensive and if you don’t have a dedicated space for it in your craft room they can be heavy and bulky to move around. Heat presses are great to provide the consistent heat and even pressure that you need for awesome results.
Cricut created my favorite solution…the
Cricut Easy Press 2. Cricut Easy Press provides you with the consistent even heat, is portable and easy to store, and comes with a safety base! The Cricut Easy Press family ranges in sizes to help you apply your Iron-on design of any size.
- 12” x 10” – Jumbo landscape which is ideal for larger T-shirts, sweatshirts, banners, blankets, and more
- 9” x 9” – Basic square which is ideal for basic T-shirts, tote bags, pillows, aprons, and more
- 6” x 7” - Smaller design ideal for projects like baby clothes, accessories, hats, and more
- Mini - Compact size ideal for unusually small or challenging projects like hats, shoes, or stuffed animals

Cricut also created the
Heat Transfer Guide to take the guesswork out of the best Easy Press settings to use for the type of Iron-on material you are using on your project.
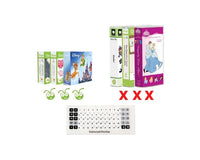
Legacy Machine Iron-on tips (Expression, Original Cricut, etc)
- Place Iron-on Sheet, liner side down on StandardGrip Mat.
- Activate the Flip function to mirror your characters.
- Recommended settings:
- Blade – 2
- Pressure – 3
- Speed – 2
- Always do a test cut first. Settings may vary depending on type and texture of Iron-on Material you are using
Click the image below to see our selection of Cricut Iron-on Cartridges 
Cricut Design Space Iron-on tips:
- Place Iron-on Sheet, liner side down on StandardGrip Mat.
- Toggle on the Mirror setting
- Set type of Iron-on from the list of materials
- If using a Cricut Explore machine, turn Smart Set Dial to Custom.
- Always do a test cut first. Settings may vary depending on type and texture of Iron-on Material you are using